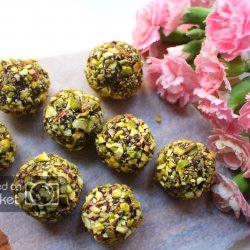
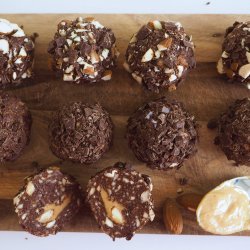
Evening lovelies, are you ready for my newest little DIY project? I have been so excited to sh
Se næste indlæg >


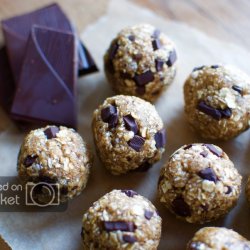
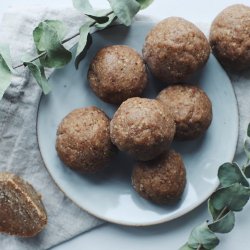
Post workout protein snack balls

Evening lovelies ♥ I Am just stopping by to share the recipe for these delicious and filling protein snack balls with you guys – they are my new go-to for a quick post-workout snack, but I also love to enjoy them as a little afternoon treat along with a cup of tea. I always get super hangry after my workouts, so these snack balls are absolutely perfect to bring with me in my gym bag for a quick and easy snack in the locker room or on my walk home from the gym.
The snack balls contain hemp protein for an extra protein boost that I appreciate after a hard workout, but it can easily be left out if you prefer – without the protein powder the snacks balls are the perfect little healthy treat, they mostly taste of peanut butter and are a great healthy alternative if you, like myself, have a sweet tooth ♥
Find more of my favorite snack recipes right here!
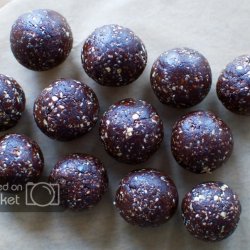
Ingredients:
2 deciliter (about 0.8 cup) mixed nuts & seeds*
1 deciliter (about 0.4 cup) pitted dates
1 deciliter (about 0.4 cup) peanut butter
2-4 tablespoons hemp protein powder – optional
*I used a mix of hazelnuts, pine nuts, pumpkin seeds, sunflower seeds, hemp seeds, chia seeds
Directions:
Start by adding the nuts and seeds to a pan on medium/high heat and roast them until they become fragrant and turn lightly golden, then set them aside to cool off.
When the nuts and seeds have cooled, then simply add all the bliss ball ingredients to a food processor and pulse until you have a sticky dough. Depending on if and how much protein powder you use, then you might need to add a little extra peanut butter or dates to make the dough sticky enough. Roll the dough into bite sized bliss balls, place them in an airtight container and store them in the fridge until serving, they keep for about 5 days. Enjoy! ♥

Nøj, de ser bare gode ud!
– A